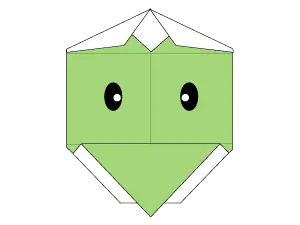
Learn how to make an easy origami kappa face.You need to prepare a square piece of paper. It’s better if it’s colored.Follow the following tutorial step by step. It’s easy to do. It is very suitable for beginners and kids. Let’s get started.
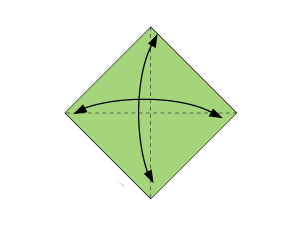
- Fold in half twice to make creases and fold back.
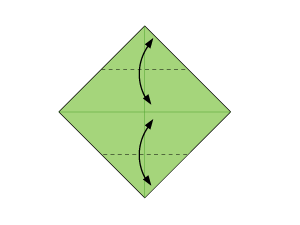
- Make creases by folding both the top and the bottom corners to cerner point.
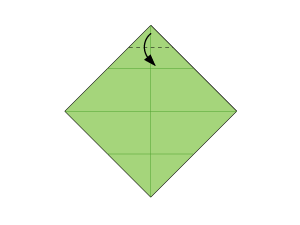
- Fold the top corner to center point of the crease made in step 2.
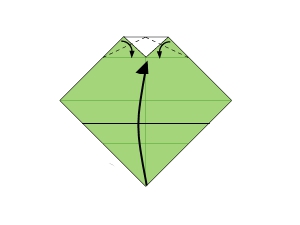
- Fold both top corners down along the dotted line as shown below.Fold the bottom corner up along the dotted line.
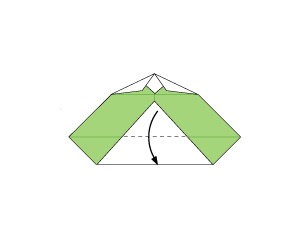
- Fold the top corner of the upper layer down through the center point of the bottom edge.
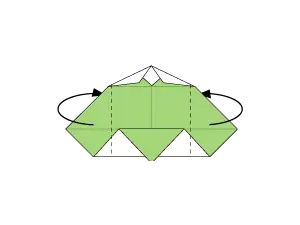
- Fold behind both the left and the right corners to center line.
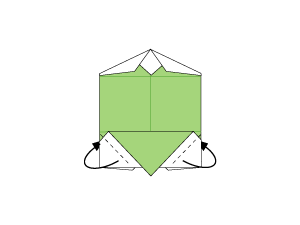
- Fold behind both corners of the bottom edge along the dotted line.
- Stick the eyes and finished.
Step 1
:Fold in half twice to make creases and fold back.
Step 2
:Make creases by folding both the top and the bottom corners to cerner point.
Step 3
:Fold the top corner to center point of the crease made in step 2.
Step 4
:Fold both top corners down along the dotted line as shown below.Fold the bottom corner up along the dotted line.
Step 5
:Fold the top corner of the upper layer down through the center point of the bottom edge.
Step 6
:Fold behind both the left and the right corners to center line.
Step 7
:Fold behind both corners of the bottom edge along the dotted line.
Step 8
:Stick the eyes and finished.

