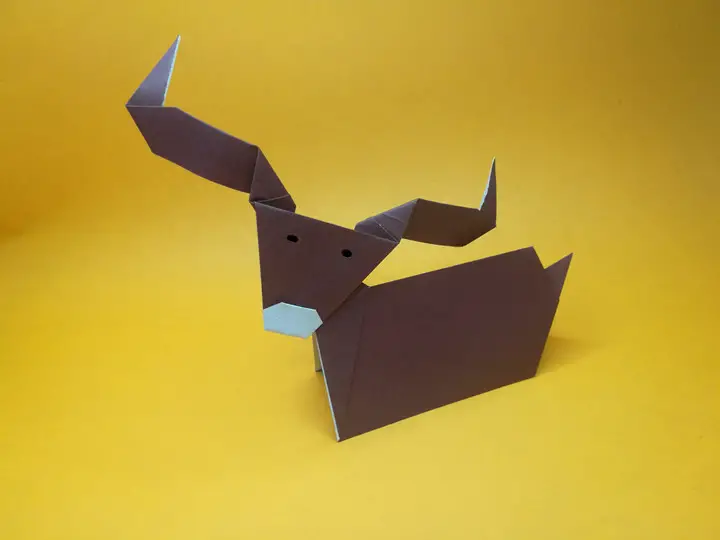
Here’s how to fold a very easy origami tiger face that’s also very cool. You should to use square paper and follow the instructions step by step,Just need 11 steps you will get your own paper tiger face.
You need to prepare colored pencils, because in the last step, you need to draw faces for your paper tiger.
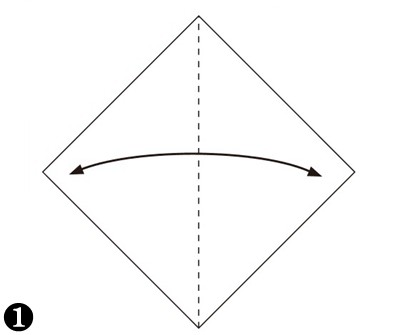
Step 1
: Start with a square sheet of paper with the white side up. Fold in half to make a crease and fold back.
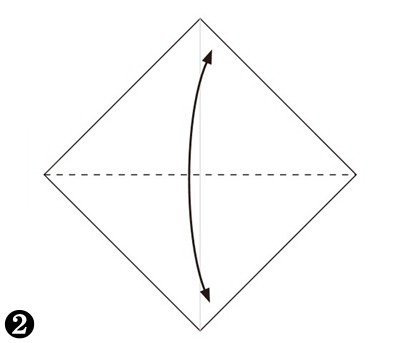
Step 2
: Fold the top corner down to the bottom corner along the center line.
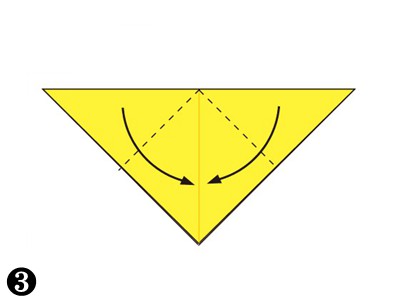
Step 3
: Fold both left and right corners down to the bottom corner.
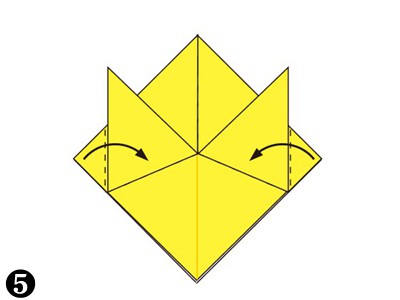
Step 4
: Fold the bottom corner of the upper layer up along the dotted line.You should see both left and right edge of the upper layer are parallel to the center line.
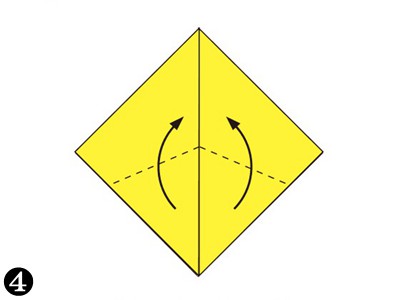
Step 5
: Fold both left and right corners to the middle.
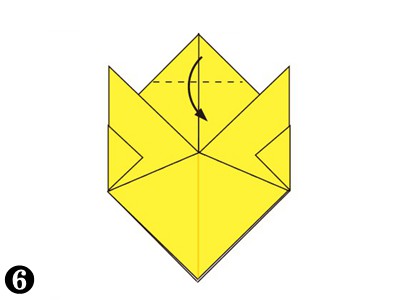
Step 6
: Fold the top corner down along the dotted line.
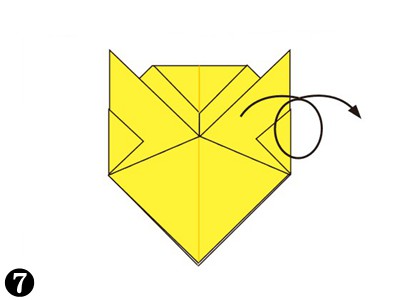
Step 7
: Turn over.
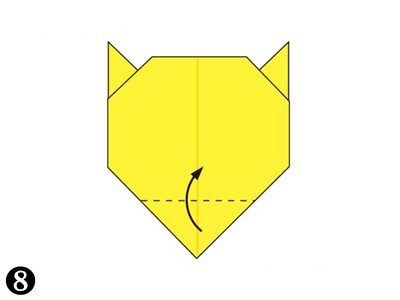
Step 8
: Fold the bottom corner of the upper layer up.
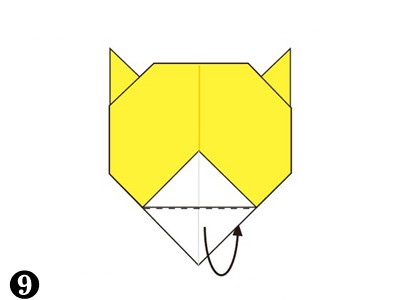
Step 9
: Fold the bottom corner backward along the dotted line.
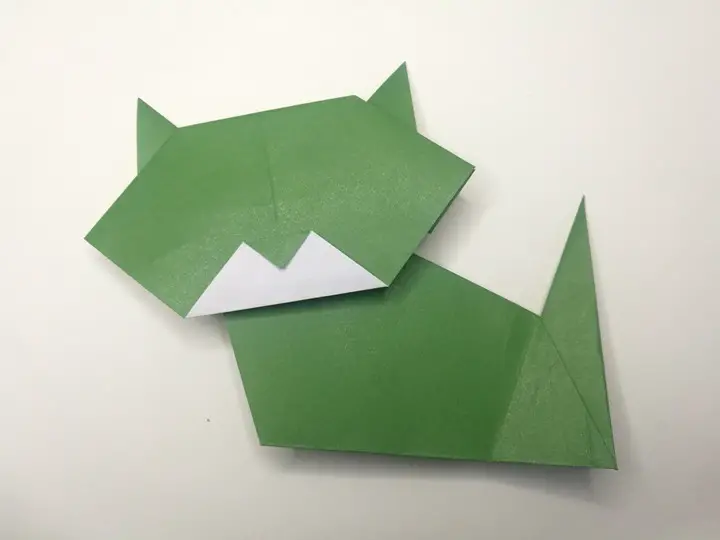
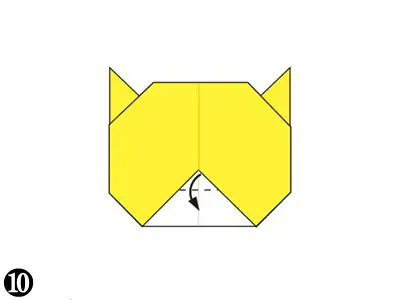
Step 10
: Fold the top corner of the upper layer down to make tiger’s nose.
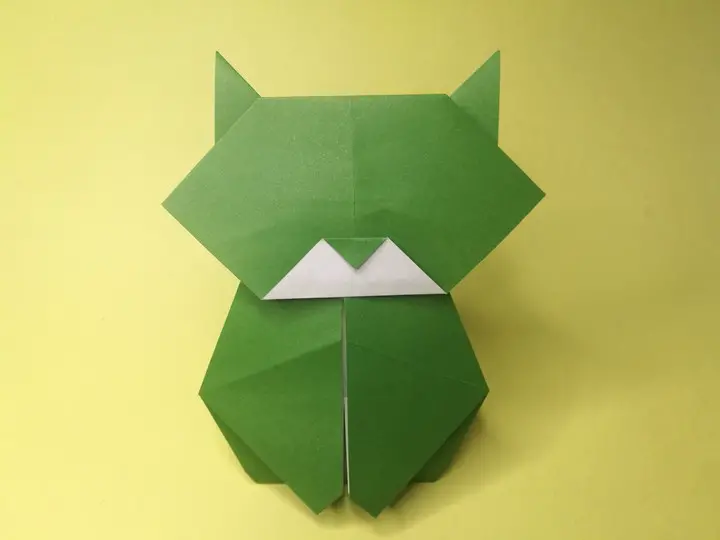
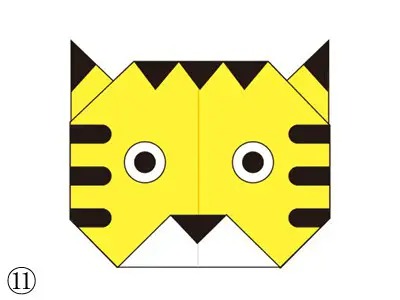
Step 11
: Draw a face and pattern and finished.
Now you know how to make an origami tiger face! Easy wasn’t it?Click on “Like” below if you like this origami!